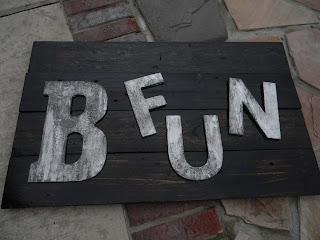
That demo is the bases of this project a sign when you walk in our house as a reminder to "B fun"!
 |
| finished product |
Stage 1, after you have decided what your projects backdrop is going to be (I've seen words and letters stuck on the wall and it looks pretty cool too) and found or made the letter font for your project you will need to lay it flat on a sheet of aluminum foil. With an exact-o knife cut out each of the letter's and set to the side (you'll need them shortly but don't want them to get messed up).
 |
| stage 1, cut out each letter |
Stage 2, with ModPodge you want to start edging all your letters with foil. The more detailed a letter the more difficult it is to edge out. Coat enough on both sides and edge with Podge, cut strips of foil, and start edging the letters out.
 |
| stage 2, edging with foil |
 |
| stage 3, foil facing out the letters |
Stage 4, using a dark grey acrylic paint and a 1" foam brush paint letters front and sides. Don't worry about the backside it's a sign you wont see it.
*Tip that I learned; only paint out one letter at a time because the paint drys to quickly for the next step.
 |
| stage 4, painting on the grey |
Stage 5, before your paint drys lightly and evenly wipe off the paint from letters. Leave paint in creases it really kicks up the faux look to actual metal.
 |
| stage 5, wipe off paint and get a nickel effect |
Stage 6, after letters are dry enough to attach play with layout. When you find the layout you like cut out some spacers to help give more dimension to you project. Layout below has no spacers behind the letters and looks a little flat and simple.
 |
| stage 6, layout and spacers |
Stage 7, attach letters to spacers with a good wood glue let dry. Then attach letters to sign with wood glue or pneumatic gun (just make sure the nails or staples aren't too long).
Now hang it, give it, sell it, whatever...
 |
| stage 7, attaching spacers and letters |
This is really fun and affordable project that's a self reminder to myself and to all who enter our house to "B fun!"

No comments:
Post a Comment
Note: Only a member of this blog may post a comment.